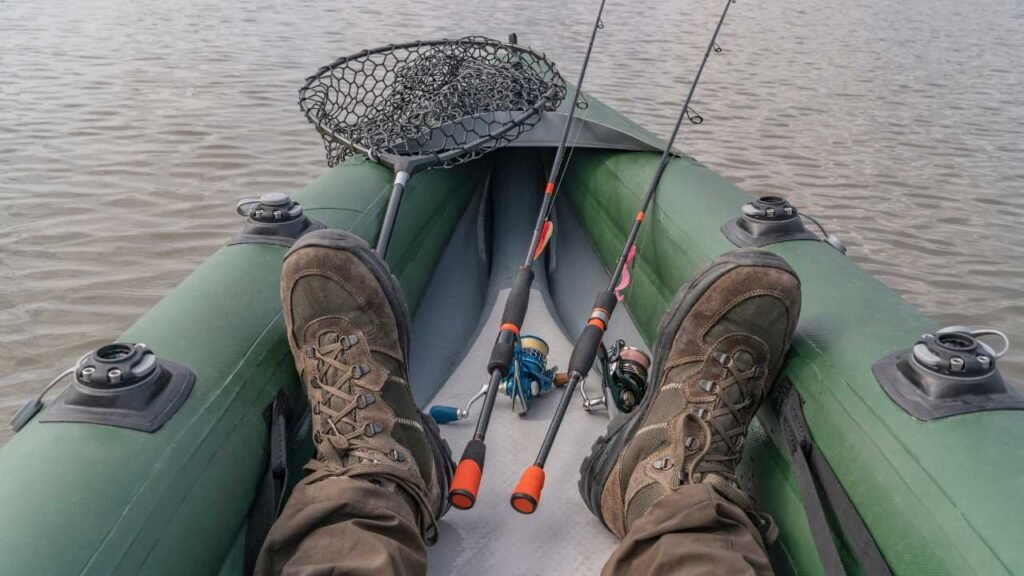
To add a fishing rod holder to a kayak, first choose an appropriate location. Then, securely mount the holder using screws or adhesive.
Fishing from a kayak offers a unique and immersive experience. Adding a fishing rod holder can greatly enhance convenience and efficiency. Proper installation ensures that your rod stays secure, freeing up your hands for paddling or other tasks. Choose a holder that suits your kayak’s design and your fishing style.
Placement is crucial; it should be easily accessible but not obstructive. Use high-quality screws or marine-grade adhesive for a secure fit. By following these steps, you can enjoy a more streamlined fishing experience, making your time on the water more enjoyable and productive.

Credit: www.plusinno.com
Choosing The Right Fishing Rod Holder
Adding a fishing rod holder to your kayak enhances your fishing experience. It keeps your rods secure and within reach. But how do you choose the right one? This guide will walk you through the types of rod holders and material considerations.
Types Of Rod Holders
There are different types of rod holders available. Each serves a unique purpose.
- Flush Mount Rod Holders: These are built into the kayak. They offer a sleek look but require drilling.
- Deck Mount Rod Holders: These are attached to the kayak’s deck. They are adjustable but might take up more space.
- Clamp-On Rod Holders: These are perfect for temporary setups. They can be easily removed and repositioned.
Material Considerations
The material of the rod holder affects its durability and performance.
| Material | Pros | Cons |
|---|---|---|
| Plastic | Lightweight and affordable | Less durable than metal |
| Stainless Steel | Highly durable and rust-resistant | Heavier and more expensive |
| Aluminum | Strong and lightweight | Can corrode if not anodized |
Consider these factors when selecting a rod holder for your kayak. The right choice will make your fishing trips more enjoyable and efficient.
Essential Tools And Materials
Adding a fishing rod holder to your kayak is simple. But you need the right tools and materials. This guide will help you gather everything you need.
Tool List
- Drill: A cordless drill works best.
- Drill Bits: Different sizes for various screws.
- Screwdriver: Preferably both Phillips and flat-head.
- Measuring Tape: For accurate measurements.
- Marker: To mark drilling spots.
- Wrench: To tighten bolts.
- Safety Goggles: Protect your eyes while drilling.
Materials Needed
- Fishing Rod Holder: Choose one that fits your kayak.
- Screws and Bolts: Stainless steel to prevent rust.
- Mounting Bracket: To attach the rod holder.
- Sealant: Waterproof sealant to prevent leaks.
- Rubber Gasket: Ensures a tight seal.
| Tool | Purpose |
|---|---|
| Drill | Drill holes for screws |
| Screwdriver | Tighten screws and bolts |
| Measuring Tape | Measure and mark spots |
| Marker | Mark drilling spots |
| Wrench | Tighten bolts |
Having the right tools and materials makes the job easier. Gather everything before you start. Happy fishing!
Finding The Ideal Location
Adding a fishing rod holder to your kayak enhances your fishing experience. The first step is to find the perfect spot. This will ensure balance, easy access, and a comfortable fishing trip.
Balancing The Kayak
Balance is key for a stable kayak. Placing the rod holder in the right spot helps maintain this balance.
- Position the rod holder near the center of the kayak.
- Ensure it is equidistant from both sides.
- Avoid placing it too far to the front or back.
A well-balanced kayak prevents tipping and enhances your fishing experience.
Accessibility
Easy access to your fishing rod is crucial. You want to grab your rod quickly without losing balance.
- Place the rod holder within arm’s reach.
- Ensure it does not obstruct paddling.
- Test different spots while seated.
Accessible placement lets you focus on fishing, not fumbling for your rod.
| Location | Pros | Cons |
|---|---|---|
| Front | Easy access | May obstruct paddling |
| Side | Good balance | May be hard to reach |
| Behind Seat | Out of the way | Hard to reach quickly |
Choosing the right spot ensures a safe and enjoyable kayak fishing experience.

Credit: www.youtube.com
Preparing The Kayak
Before adding a fishing rod holder, prepare your kayak properly. This ensures the holder stays secure and lasts longer. Follow these steps to get your kayak ready.
Cleaning The Surface
Start by cleaning the surface where you will install the holder. Use a mild soap and water solution. This removes any dirt, grime, or debris. A clean surface ensures the adhesive sticks well.
- Wet a cloth with the soap solution.
- Wipe down the area thoroughly.
- Rinse the area with clean water.
- Dry the surface completely before proceeding.
Marking The Drilling Points
Next, mark the drilling points for the holder. Use a pencil or marker to outline the spots. This ensures precision when drilling.
- Place the holder on the desired spot.
- Check its alignment with the kayak’s edge.
- Mark each hole location with a pencil.
- Double-check the marks for accuracy.
Make sure the marks are visible and correct. This helps in drilling the holes in the right place.
Drilling And Mounting The Holder
Adding a fishing rod holder to your kayak can improve your fishing experience. This section will guide you through drilling and mounting the holder safely and effectively.
Drill Safety Tips
- Wear safety goggles to protect your eyes.
- Ensure the kayak is stable before drilling.
- Use a sharp drill bit for clean holes.
- Mark the drilling spots with a marker.
- Drill slowly to avoid cracking the kayak.
Securing The Holder
- Align the holder with the drilled holes.
- Insert screws through the holes in the holder.
- Use a screwdriver to tighten the screws.
- Ensure the holder is firmly attached.
- Test the holder with a fishing rod.
Proper drilling and mounting ensure the holder’s stability and your kayak’s safety.
Testing The Setup
After installing the fishing rod holder, it’s time to test the setup. This ensures it works as expected and remains secure during your kayaking adventures. Follow these steps to make sure your setup is perfect.
Stability Check
First, check the stability of your fishing rod holder. Place your kayak in water. Insert a fishing rod into the holder. Gently rock the kayak side to side. Observe if the holder moves or stays firm. If it wobbles, it needs adjustment. Tighten screws or bolts as necessary. Test again until it remains stable.
Adjusting The Position
Next, focus on adjusting the position of the holder. Sit in your kayak as you would when fishing. Reach for the rod in the holder. Ensure it is easy to grab and put back. If it feels awkward, adjust the angle or height. Repeat until you find the perfect position. This step is crucial for a comfortable fishing experience.
Testing your setup ensures a smooth and enjoyable day on the water. Make these checks a routine part of your kayak fishing preparation.
Additional Accessories
Adding a fishing rod holder to your kayak is just the beginning. Additional accessories can enhance your fishing experience. These accessories provide convenience and safety during your fishing trips.
Leashes And Tethers
Leashes and tethers are essential accessories for kayak fishing. They help secure your fishing gear, preventing loss if the kayak tips over. Here are a few types of leashes and tethers you might consider:
- Paddle Leash: Keeps your paddle attached to the kayak.
- Rod Leash: Secures your fishing rod to avoid losing it.
- Accessory Tethers: Attach small items like pliers or tackle boxes.
Using leashes and tethers is simple. Attach one end to the kayak and the other to your gear. This way, your items stay with you, even in rough waters.
Mounting Extra Holders
Mounting extra holders can increase your fishing efficiency. Extra holders keep your rods and gear organized. Here are some options for mounting extra holders:
| Type | Benefits |
|---|---|
| Flush Mount Holders: | Installed into the kayak, saving space. |
| Deck Mount Holders: | Mounted on the kayak deck, easy to access. |
| Clamp-On Holders: | Attached to the kayak without drilling. |
Choose the type that suits your needs. Install them securely to ensure stability. Extra holders can make your fishing trip more organized and enjoyable.
How to Install Kayak Fish Finder: Easy Step-by-Step Guide
Maintenance Tips
Maintaining your fishing rod holder ensures it lasts longer. Proper care keeps it functioning well. Follow these tips to keep your holder in top shape.
Regular Inspection
Inspect your fishing rod holder frequently. Look for any signs of wear. Check for cracks or loose parts. Tighten any screws that might be loose. Ensure the holder is securely attached to your kayak. A quick inspection can prevent bigger problems later.
Cleaning The Holder
Clean your fishing rod holder after every use. Use fresh water to rinse off salt and dirt. This prevents corrosion and build-up. For a deeper clean, use mild soap and a soft brush. Ensure you dry it thoroughly before storing. A clean holder performs better and lasts longer.

Credit: m.youtube.com
Adding a fishing rod holder to your kayak enhances your fishing experience. It’s simple and improves your efficiency. Follow these steps to upgrade your kayak for better fishing adventures. Enjoy the convenience and increased success on your next fishing trip.
Happy kayaking and fishing!
FAQs:
What Tools Are Needed To Install A Rod Holder?
To install a rod holder, you need a drill, screws, a screwdriver, and a measuring tape. Having a sealant can also help to prevent leaks.
Can I Install A Rod Holder On Any Kayak?
Yes, you can install a rod holder on most kayaks. However, it’s important to choose a suitable location and ensure your kayak’s material can support it.
How Do I Choose The Best Location?
Choose a location that’s within easy reach but doesn’t interfere with paddling. Consider stability and weight distribution to maintain balance.
Is It Difficult To Install A Fishing Rod Holder?
Installing a fishing rod holder is generally straightforward. With the right tools and instructions, most people can complete the installation in under an hour.


