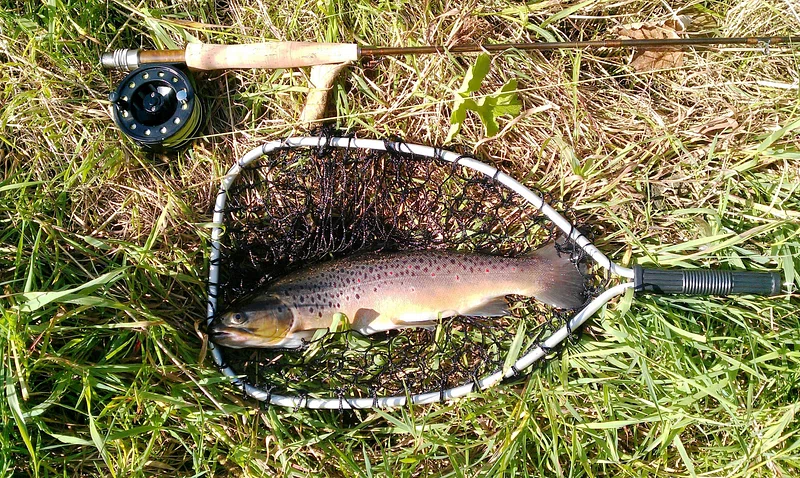
To make a trout fishing net, gather materials like a wooden frame, netting material, and a handle. Assemble them using basic tools and techniques.
Creating your own trout fishing net can be a rewarding and practical endeavor. A custom-made net allows you to choose the right size, shape, and materials to suit your fishing needs. Begin by selecting a sturdy wooden frame, which will form the backbone of your net.
Opt for netting material that is durable and tangle-resistant. Attach the netting securely to the frame using strong knots or adhesives. Finally, add a comfortable handle for easy maneuverability. With a bit of effort and craftsmanship, you can create a reliable and efficient trout fishing net tailored to your preferences.
Materials Needed
Creating a trout fishing net requires specific materials. Gather the right tools and netting for a durable and effective net. Follow this guide to ensure you have everything you need.
Essential Tools
Start with the essential tools. These will make the process easier and more efficient. Below is a list of tools you need:
- Measuring Tape: For accurate measurements of net dimensions.
- Scissors: To cut the netting material cleanly.
- Needle and Thread: For sewing the netting to the frame.
- Wooden Frame: The base structure for your net.
- Sandpaper: To smooth the wooden frame.
- Glue: For additional strength to the frame joints.
Choosing The Right Netting
The netting is crucial for catching trout. Choose the right type for durability and effectiveness. Consider these factors:
| Netting Type | Features |
|---|---|
| Monofilament | Strong, invisible underwater, ideal for clear waters. |
| Nylon | Durable, versatile, suitable for various water conditions. |
| Polyester | Resistant to UV damage, good for sunny environments. |
Select netting with small mesh. This helps in catching trout effectively. Ensure the netting material is light but strong. This balance is crucial for ease of use and durability.
Preparing The Frame
Creating a sturdy frame is crucial for a reliable trout fishing net. The frame’s strength ensures the net holds up under pressure. In this section, we’ll guide you through the steps of preparing the frame, from selecting the right wood to cutting it to size.
Selecting The Wood
Choosing the right wood is vital for a durable frame. The wood should be both lightweight and strong. Popular choices include:
- Ash: Known for its flexibility and strength.
- Maple: Offers durability and a smooth finish.
- Oak: Provides excellent strength but can be heavier.
Ensure the wood is free from knots and cracks. This ensures a smooth and sturdy frame. A piece about 1 inch thick and 3 feet long is ideal.
Cutting The Frame
Once you have selected your wood, it’s time to cut the frame. Follow these steps for precise cutting:
- Measure and mark the wood to your desired dimensions.
- Use a jigsaw or handsaw for clean cuts.
- Sand the edges to remove splinters and rough spots.
Here’s a quick table to help with measurements:
| Part | Length | Width |
|---|---|---|
| Handle | 12 inches | 1 inch |
| Frame | 24 inches | 1 inch |
After cutting, assemble the pieces to form the frame. Use wood glue and clamps to hold everything together. Allow it to dry completely before moving on to the next step.
Shaping The Frame
Creating a strong and durable frame is essential for your trout fishing net. This part of the process ensures your net is robust and reliable. The frame provides the necessary support for the netting and ensures ease of use while fishing.
Sanding And Smoothing
Start by selecting a piece of wood. It should be sturdy and lightweight. Use a saw to cut the wood into the desired shape for the frame. Ensure the edges are smooth and even.
Next, sand the wood to remove any rough spots. This step is crucial to prevent splinters and ensure a comfortable grip. Use a medium-grit sandpaper first. Then, switch to a fine-grit sandpaper for a smooth finish.
For an even smoother surface, consider using a sanding block. This tool helps maintain an even pressure while sanding. Pay special attention to the areas where the net will attach. A smooth surface here will help secure the net tightly.
Forming The Handle
Once the frame is smooth, focus on forming the handle. The handle should be comfortable to hold and provide a firm grip. Use a saw to cut the handle to your desired length. A longer handle offers better reach, while a shorter handle provides better control.
Shape the handle using a carving knife. Round the edges to fit comfortably in your hand. Sand the handle thoroughly to ensure a smooth finish. You can wrap the handle with a grip tape for extra comfort and better grip.
Consider adding a loop at the end of the handle. This loop can be used to attach a lanyard or wrist strap. It helps secure the net to your wrist, preventing accidental drops into the water.
| Step | Description |
|---|---|
| 1 | Cut the wood to the desired shape |
| 2 | Sand the wood to remove rough spots |
| 3 | Shape the handle for comfort and grip |
| 4 | Optional: Add a loop for a lanyard |

Credit: m.youtube.com
Attaching The Net
Attaching the net to your trout fishing net frame is a crucial step. A secure net ensures you catch and keep trout effectively. Follow these steps to attach the net correctly.
Measuring The Netting
First, you need to measure the netting. Use a measuring tape to get the length and width of the net. Make sure the net is slightly larger than the frame. This extra size will help in securing the net properly.
| Measurement | Details |
|---|---|
| Length | Measure from one end to the other |
| Width | Measure across the widest part |
Securing The Net
Once you have your measurements, it’s time to secure the net. Follow these steps:
- Align the net with the frame.
- Use zip ties or strong thread to attach the net.
- Secure the corners first, then the sides.
- Make sure the net is tight and doesn’t sag.
Check the net for any loose spots. Tighten any loose areas to ensure the net is secure.
- Use a double knot for extra security.
- Trim any excess netting for a neat finish.
Your net is now ready for your next fishing adventure. Enjoy catching trout with your newly secured net!
Finishing Touches
Now that you’ve assembled your trout fishing net, it’s time for the finishing touches. These steps will ensure your net is durable and comfortable to use.
Varnishing The Wood
Varnishing the wood is crucial. It protects the wood from water damage and gives it a smooth finish.
- Choose a high-quality marine varnish.
- Apply the first coat using a brush.
- Let it dry for 24 hours.
- Lightly sand the surface with fine-grit sandpaper.
- Wipe away the dust with a clean cloth.
- Apply at least two more coats, sanding between each layer.
Make sure the varnish dries completely. This ensures the wood is well-protected and looks great.
How to Catch Sea Trout
Adding Grip To Handle
Adding a grip to the handle makes your net easier to hold, especially when wet.
Here are some materials you can use:
- Rubber tape
- Cork
- Leather strips
Follow these steps to add a grip:
- Measure the handle’s length.
- Cut your chosen material to the measured length.
- Wrap the material tightly around the handle.
- Secure the ends with waterproof adhesive or small nails.
A good grip ensures a firm hold while fishing. This is especially important in slippery conditions.
Testing The Net
Before using your homemade trout fishing net, it’s crucial to test it. Testing ensures your net can handle the rigors of fishing. This step helps you avoid losing fish and ensures your net lasts longer.
Checking For Strength
First, you need to check the strength of your net. This ensures it can handle the weight of a trout. To do this, fill a bucket with water. The bucket should weigh around 10 pounds, similar to a large trout.
Next, tie the net to a sturdy object, like a tree or fence post. Lift the bucket using the net. If the net holds without tearing, it passes the strength test. If it tears, reinforce the weak spots and test again.
Ensuring Proper Function
After checking strength, ensure the net functions properly. This means it should scoop and release fish easily. To test this, fill a small pool with water and place a few objects in it.
- Use small, light objects like plastic toys.
- Scoop the objects from the pool using your net.
- Check if the net catches and releases objects smoothly.
If the net struggles to scoop or release, adjust the mesh size. A tight mesh might not release fish easily, while a loose one might not catch them well.
Testing your net ensures it is ready for your fishing adventures. Happy fishing!
Troubleshooting Common Issues
Trout fishing nets can encounter various issues. Knowing how to troubleshoot these problems ensures your net remains effective and durable. Let’s explore some common issues and their solutions.
Fixing Loose Netting
Loose netting can cause your catch to escape. Here’s how to fix it:
- Inspect the net: Check for gaps or tears in the net.
- Gather materials: You will need a needle and strong thread.
- Stitch the gaps: Use a simple stitch to close any gaps.
- Secure the ends: Tie knots at both ends to prevent unraveling.
If the netting is too damaged, consider replacing it entirely. Use a durable netting material for long-lasting results.
Reinforcing Weak Spots
Weak spots in the net can reduce its effectiveness. Reinforcing them is crucial. Here’s a step-by-step guide:
- Identify weak spots: Look for frayed or thin areas.
- Use extra thread: Double the thread for added strength.
- Apply patch: Cut a small piece of netting to cover the weak spot.
- Sew the patch: Stitch the patch securely over the weak area.
- Test the net: Give it a gentle tug to ensure stability.
Maintaining your fishing net ensures a successful and enjoyable fishing experience. Regular checks and timely repairs keep your net in top condition.

Credit: m.youtube.com
Caring For Your Net
Caring for your trout fishing net ensures its longevity and performance. Proper maintenance keeps it in top shape, ready for your next fishing adventure. Follow these tips to care for your net effectively.
Cleaning Tips
Regular cleaning removes dirt and debris from your net. Use the following steps:
- Rinse with freshwater: After each use, rinse your net with freshwater.
- Use mild soap: Mix mild soap with water for a thorough cleaning.
- Gently scrub: Use a soft brush to scrub the net.
- Rinse again: Rinse off all soap residue with clean water.
- Dry completely: Hang the net to air-dry completely before storage.
Storage Solutions
Proper storage helps maintain your net’s shape and functionality. Consider these storage solutions:
- Dry environment: Store the net in a dry place to prevent mold.
- Avoid direct sunlight: Keep the net away from direct sunlight to avoid damage.
- Use hooks or racks: Hang the net on hooks or racks to maintain its shape.
- Regular inspection: Check the net regularly for any signs of wear or damage.
| Cleaning Task | Frequency |
|---|---|
| Rinse with freshwater | After each use |
| Use mild soap | Monthly |
| Gently scrub | Monthly |
| Dry completely | After each use |
| Inspect for damage | Monthly |
Crafting your own trout fishing net is rewarding and practical. With the right materials and patience, you can create a durable net. Enjoy the satisfaction of using a tool made by your hands. Now, head out and catch some trout with your custom fishing net.
Happy fishing!
FAQs:
How To Make Trout Nets?
To make trout nets, gather nylon netting, a hoop, and a handle. Sew the netting to the hoop securely. Attach the handle firmly. Ensure all knots and connections are tight. Use waterproof glue for added durability. Test the net in water before use.
What Material Is Best For Trout Net?
The best material for a trout net is rubber. It reduces harm to fish, resists tangling, and is durable.
What Is The Best Wood For A Trout Net?
The best wood for a trout net is often hardwood like teak or walnut. These woods are durable and water-resistant. They also provide a lightweight, strong frame for easier handling.
Do You Need A Special Net For Trout?
Yes, a special net for trout is recommended. Use a rubber or knotless net to protect the fish’s slime coating and scales.


